We finished our drafts! Some of my students had a stressful moment when I asked them to rewrite their stories DOUBLE-SPACED. With a colourful pen, a few redos, and some tears, my class figured it out and their stories were legible enough for their big buddies to help them edit their stories. Our poor big buddies, some of our stories were pretty easy to read and help their little buddies make spelling and punctuation correction. However, other buddies had very confusing stories. For example, my one student thought it made sense to write in all talking! His buddy had a time trying to help make it coherent.
 |
| Big buddy editors. |
We were finally able to jump into the deep end and start illustrating and putting all the pieces together. I gave all the buddies, big and little, the steps they needed to put them together. It took us 3 class sessions, 2 green screens, green or blue paper, 26 student iPads, 5 SetBC iPads, and a mountain of clay to produce the stories we created. I had given the class the option to create their characters with modelling clay or human models, of course everyone chose the clay. Most of the time spent on this final leg of the project was spent shaping the clay into beautiful characters.
 |
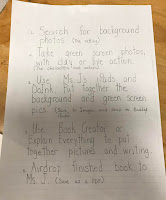
| Green screen shots using green constuction paper. |
Because I only had 5 iPads with the DoInk green screen app, I had the big buddies use their district iPads for most of the work. When they had all of their components for the green screen, background photos and green screen shots, they were able to Airdrop their pieces to the iPads with DoInk. This step was surprisingly quick and the buddies were able to create their pics and Airdrop it back to the big buddy iPads very quickly.
One drawback was the clay. My students spent a lot of time creating their characters. While taking the pictures in front of the green screen and using DoInk took very little time. However, the clay was nice to position the characters for new shots.
 We finished our drafts! Some of my students had a stressful moment when I asked them to rewrite their stories DOUBLE-SPACED. With a colourful pen, a few redos, and some tears, my class figured it out and their stories were legible enough for their big buddies to help them edit their stories. Our poor big buddies, some of our stories were pretty easy to read and help their little buddies make spelling and punctuation correction. However, other buddies had very confusing stories. For example, my one student thought it made sense to write in all talking! His buddy had a time trying to help make it coherent.

Comments
Post a Comment